BMW E46 Cooling System Overhaul DIY 325i 330i 328i 325xi 330xi
BMW E46 Cooling System Overhaul DIY 325i 330i 328i 325xi 330xi
Ever since BMW started using a lot of plastic parts for the cooling system, replacing the cooling system became part of the maintenance that should be done at around 100K in order to keep the car reliable and running cool. In this article I will show you how to replace most of the things that are known to fail on BMW E46 3-series. This project was done on a 2002 325xi but the cooling system is pretty much identical on all E46 models from 1999-2006. This article can also be used as a guide for replacing the water pump, thermostat, fan clutch, radiator or expansion tank.
Here is a list of parts you will need to overhaul your BMW E46 cooling system:
- Radiator part number 17119071519 (depending on the brand be sure to get a proper adjustment screw for manual or automatic transmission)
- Water Pump part number 11517509985
- Thermostat part number 11537509227
- Upper Radiator Hose 17127510952 and Lower Radiator Hose 11531436408
- A/C Belt 11281437450 through 08/02 or 11287512762 from 09/02
- Alternator Belt 11287636379
- Temp Sensor O-Ring 091158010 (for temp sensor in the lower radiator hose)
- Expansion tank cap 17111742231
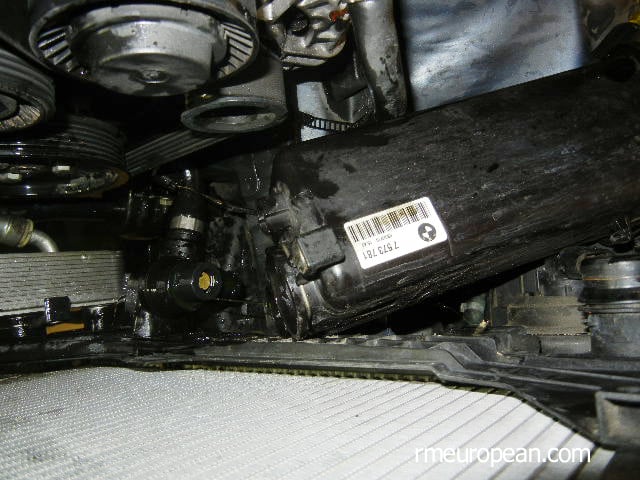
- Expansion tank17117573781
- Fan Clutch 11527505302 (if equipped)
- Two o-rings for the transmission oil cooler 17111711987 (if equipped with automatic transmission)
- Coolant drain plug washer for engine block 07119963200.
There are also some optional parts that you might want to get also:
- Expansion tank mounting plate part number 17111436250 for manual or part number 17111436251 automatic transmission
- Alternator belt tensioner 11281427252 if equipped with a mechanical tensioner. Cars with a hydraulic tensioner most of the time will only need a replacement pulley 11281748131.
- Deflection pulley 11287841228
- A/C belt tensioner 11281433571 through 08/02 or 11287512758 from 09/02
- Expansion tank thermostat 17111437362 (if equipped with automatic transmission)
- Water pump pulley 11511436590
1. Start out by removing the air intake scoop and the air filter box. Remove the clips for the fan shroud.

2. Disconnect the AUC sensor
3. Disconnect the electric fan

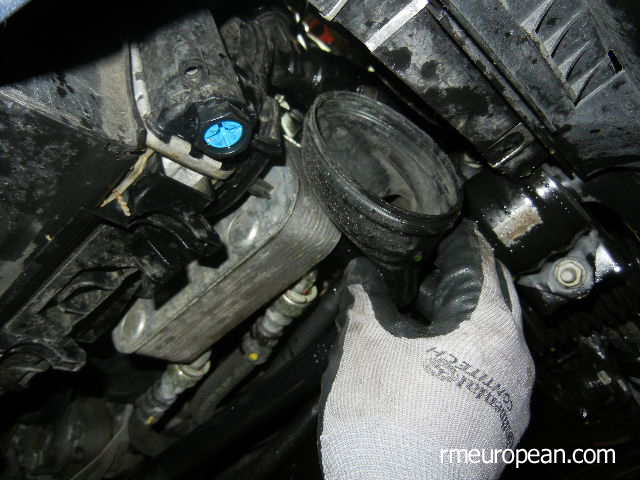
4. Using a 32mm wrench and a fan pulley holding tool remove the fan with clutch by turning the nut clockwise. The fan clutch has a reverse thread so if you are facing the car turn it to the right.
5. Once the fan clutch is off the water pump pull the shroud out together with the fan.

6. Remove the radiator drain plug and drain the coolant.

7. Remove the drain plug on the passenger side of the engine block and drain the coolant out of the block.

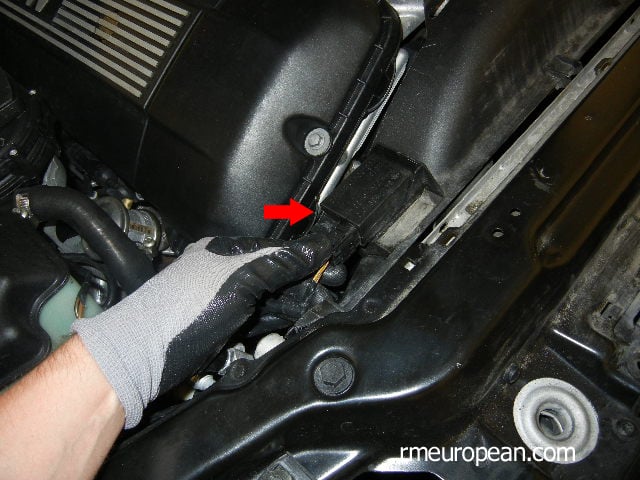
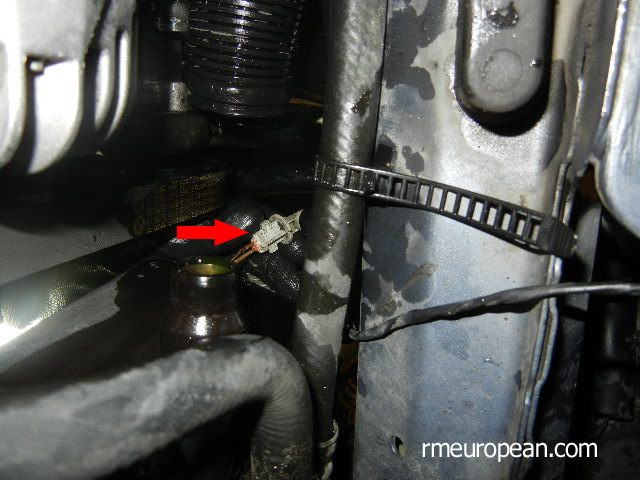
8. Disconnect the temp sensor in the lower radiator hose.
9. Pull out the clip that holds the expansion tank to the mounting plate.
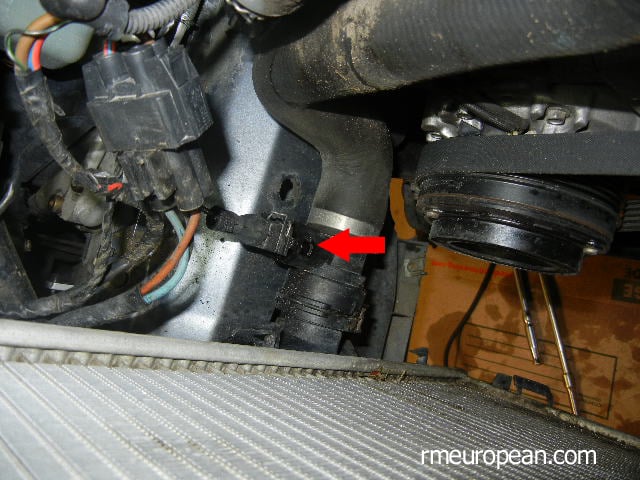
10. Unclip and pull off the small hose that connects to the bottom of the expansion tank.

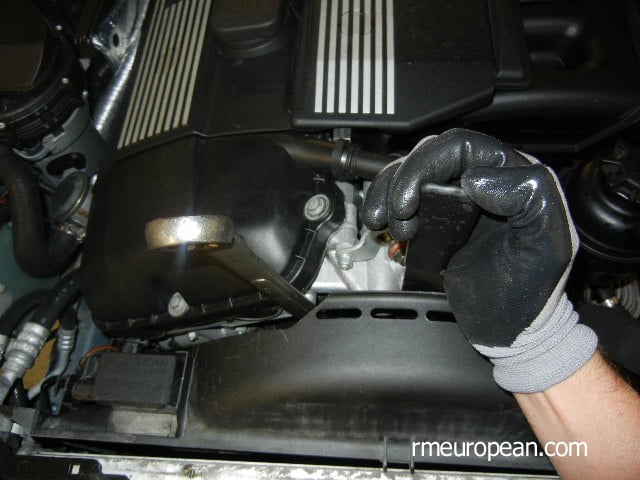
11. Remove the alternator cooling duct to gain access to the coolant level sensor.
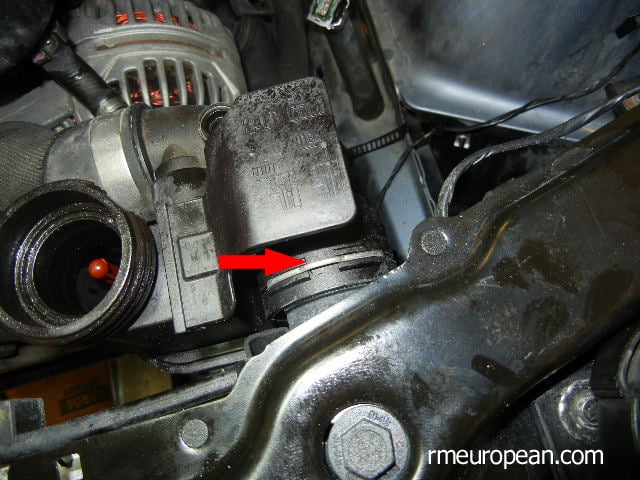
12. Disconnect the coolant level sensor wire, turn the sensor about half turn and pull it out of the tank. You are going to reuse the level sensor in the new tank.
13. Disconnect the upper radiator hose from the expansion tank.
14. Remove the expansion tank off the expansion tank mounting plate by pulling up on it. You might have to wiggle it side to side to get it to break loose.
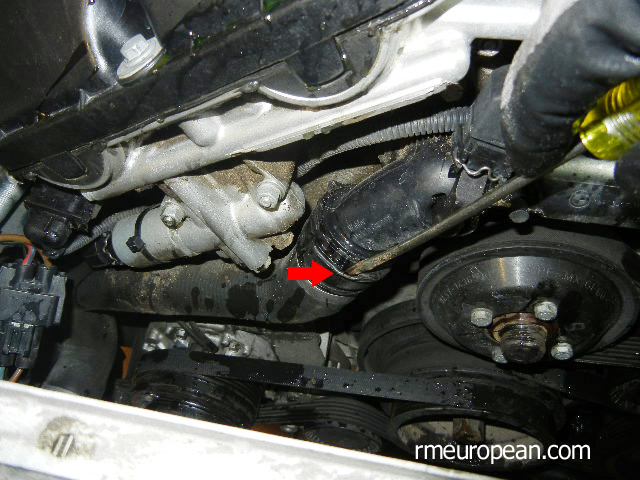
15. Unclip and remove the lower radiator hose from the thermostat.
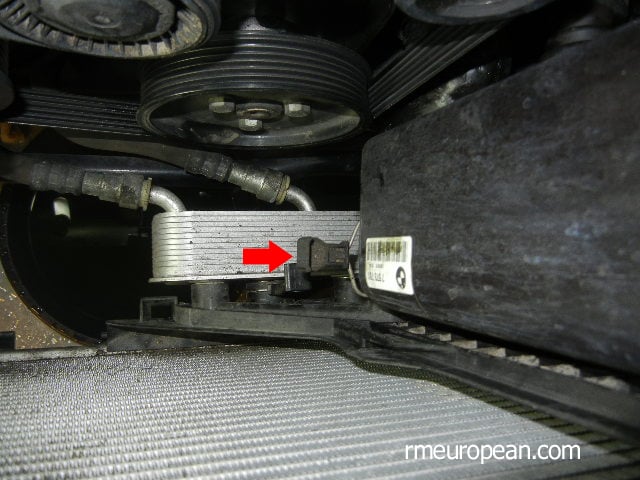
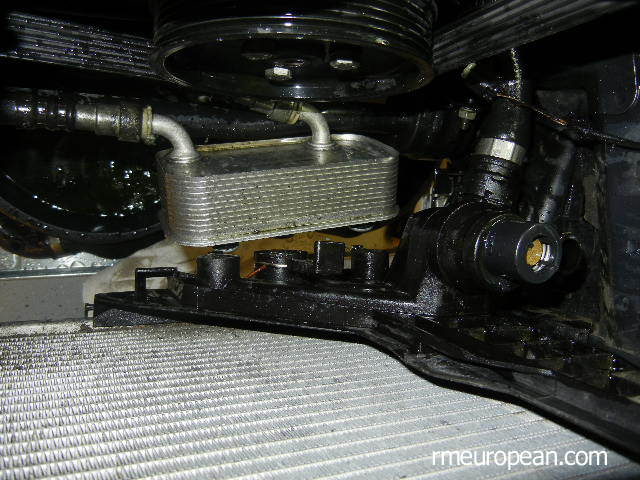
16. Unclip the transmission oil cooler from the expansion tank mounting plate, pull it out. Use new o-rings when installing it back.
17. Remove the coolant hose that connects to the bottom of the expansion tank mounting plate.

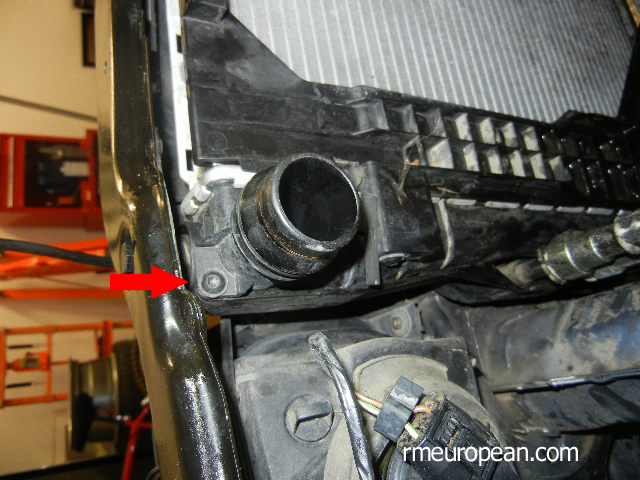
18. Remove the radiator mounting screw.
19. Push the top of the radiator back and pull it out of the car.
20. Loosen the water pump pulley bolts prior to removing the alternator belt but don't take them out all the way.
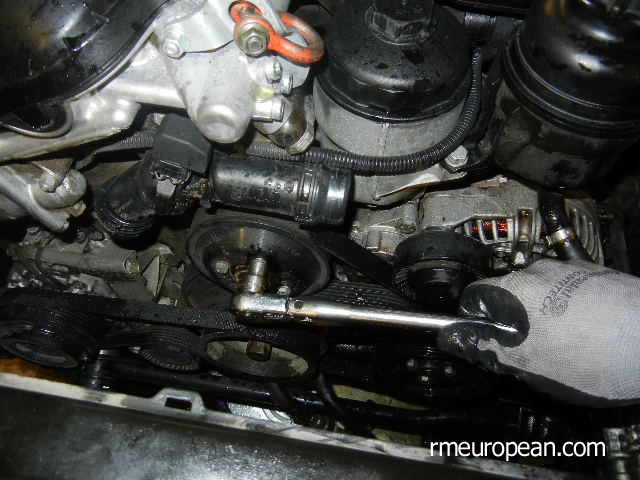
21. Using a 15mm socket turn the A/C tensioner until the belt is loose enough to be removed and remove the belt.
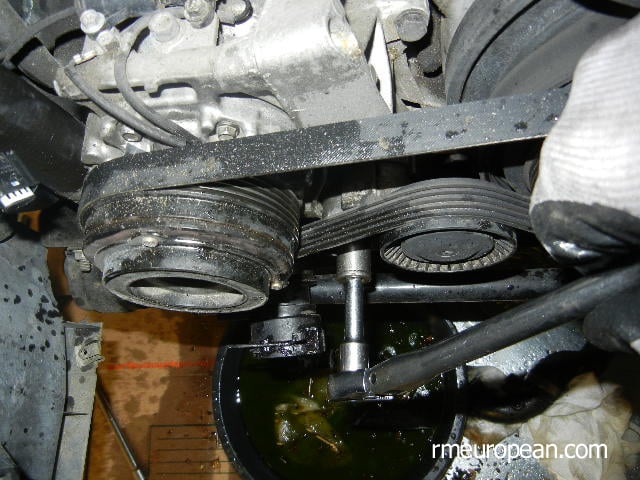
22. Using a 15mm socket turn the alternator belt tensioner until the belt is loose enough to be removed.

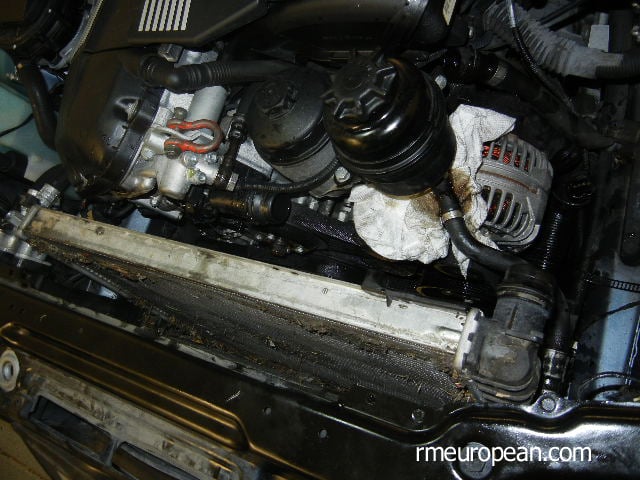
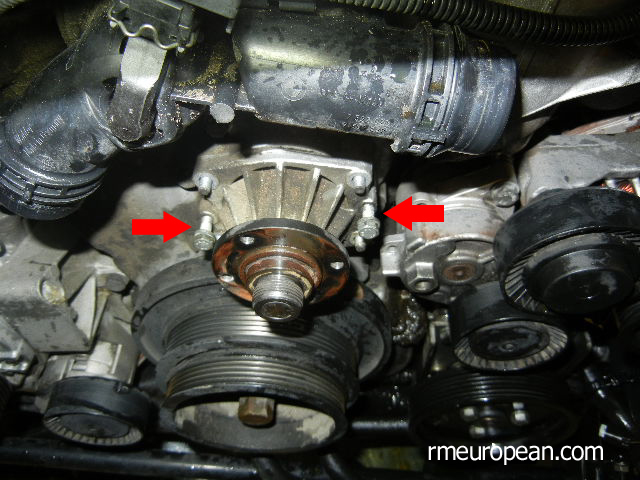
23. Remove the water pump pulley, remove the 4 nuts that hold the water pump to the timing cover, insert the bolts that were used for the pulley into two threaded holes in the water pump and tighten down the bolts gradually until the water pump pushes out of its housing.
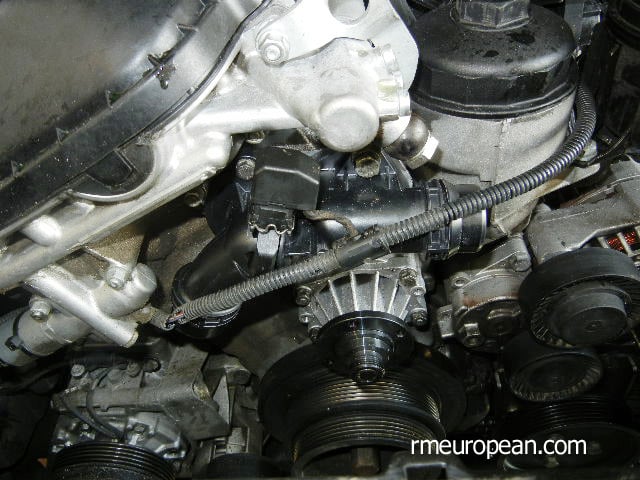
24. Remove all of the bolts that hold the thermostat to the engine. Engine lifting bracket will have to be removed as well.

25. Clean all of the water pump and thermostat mating surfaces and reinstall the thermostat and the water pump. Do not over torque the thermostat bolts. Be sure to lubricate the water pump o-ring with some fresh coolant prior to installation. Do not use any sealants on the water pump or the thermostat..
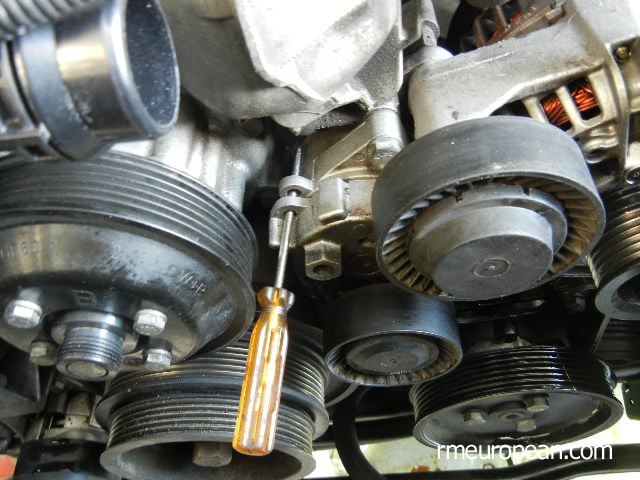
24. Using a 15mm socket and a wrench, pretension the A/C belt and the alternator belt tensioners. Use a screw driver or something similar to keep the tensioner pre-tensioned while you install the belts.
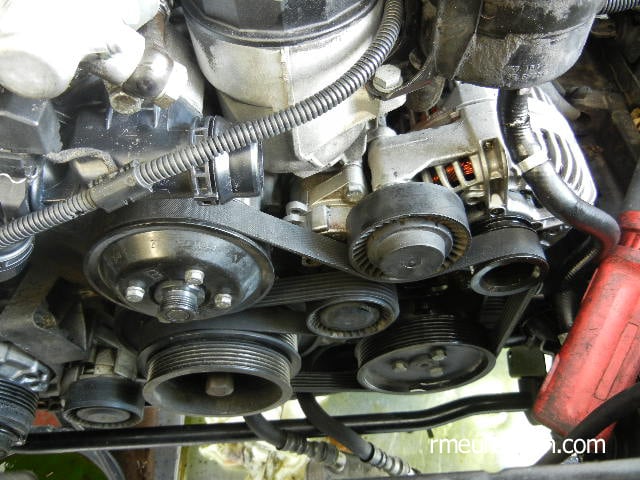
25. This picture is just to show you how the belt goes back on the engine.
26. Mount the expansion tank plate to the new radiator.
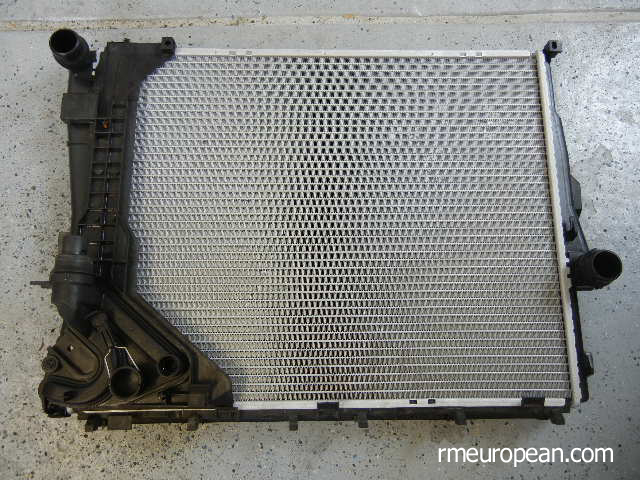
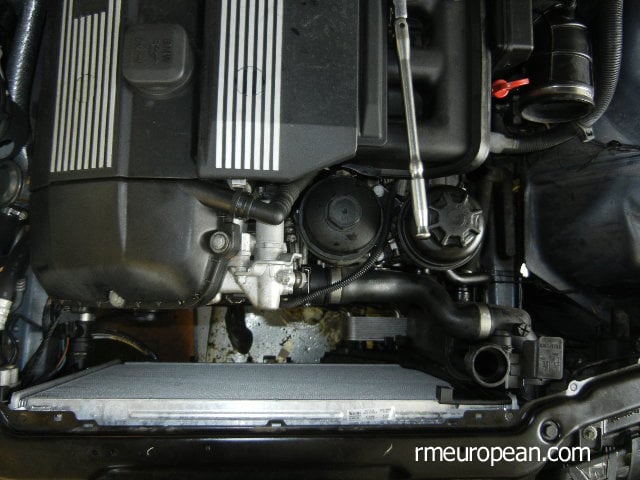
27. Install the radiator back in the car.

28. The rest is pretty self-explanatory. Reconnect all of the hoses, connectors, install the expansion tank.
29. Fill the car with coolant and check for leaks. Start the engine, open the bleeder screw and let all of the air bubbles come out. The following day check the coolant level; you'll most likely have to add some coolant to the expansion tank.